|
Le Menu
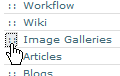
Quand les Galeries d'Images sont activées et que les permissions d'accès sont définies, les visiteurs du site Tiki peuvent voir un menu Galerie d'Images qui peut âtre ouvert. Depuis ce menu, vous serez en mesure de créer des galeries d'Images et d'y transférer des images.
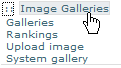
Collapsed and Expanded Menu:
Habituellement, il y a 3 options dans le menu — Galeries, Rankinks et Télécharger des images-- et les otions peuvent changer en fonction des permissions. Dans notre exemple, vous pouvez voir une autre option "Galerie Systeme". Voyons chaque option en détail.
Avant la création de galleries
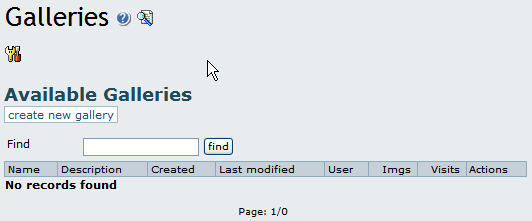
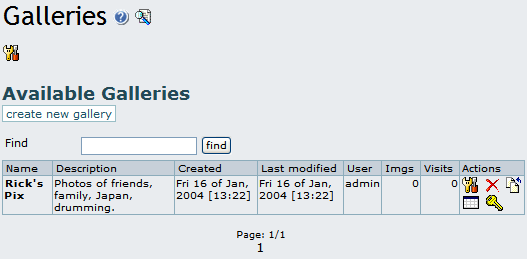
Tout d'abord, avant que les galeries soient créées et les images téléchargées dedans, le panneau principal des Galeries apparait comme dans cette illustration. Notez le lien "Créer une nouvelle galerie".
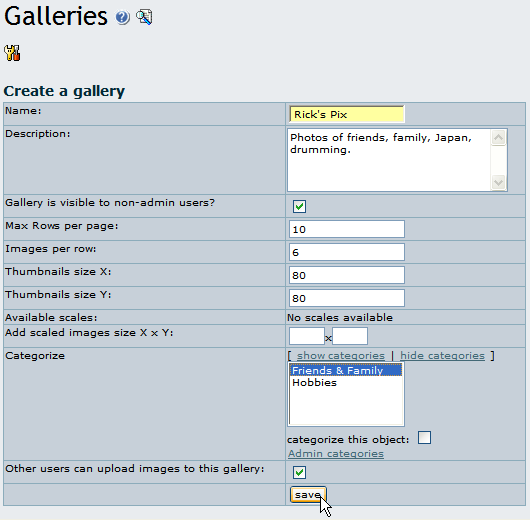
Création d'une Gallerie d'Images
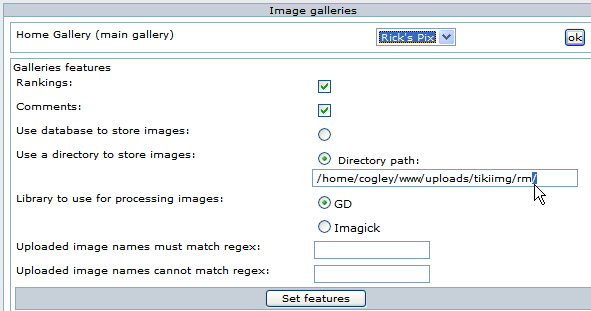
Cliquer sur le lien "créer une nouvelle galerie" affiche un formulaire pour créer une nouvelle galerie, avec des champs à remplir, comme vous pouvez le voir ici;
Les champs sont explicités dans la table suivante:
| champs | Description
| | Nom | Nom court pour la la galerie. C'est celui qui apparaît dans les listes de galeries
| | Description | Une description du contenu de la galerie
| | La galerie est visible pour les non administrateurs | Si la cas n'est pas sélectionnées, la galerie sera visible seulement pour les utilisateurs qui auront le droit d'accès tiki_p_admin_galleries positionné.
| | Géographie | if checked then images can have a longitude and latitude and be displayed using the maps feature.
| | Max Rows per page | Used for formatting gallery appearance, this is the maximum number of rows of thumbnails, per page, that will be displayed to visitors.
| | Images per row | Used for formatting gallery appearance, this is the maximum number of thumbnails per row.
| | Thumbnails size X | Width for Thumbnails, in pixels.
| | Thumbnails size Y | Height for Thumbnails, in pixels.
| | Available scales | Scales available, according to your web hosts' image formatting software. May display 'No scales available'.
| | Add scaled images size X x Y | If available, you can add a scaled image of size X pixels by Y pixels.
| | Categorize | Use categories to group your Gallery with other Tiki objects. Here you can show and hide the category list, choose a pre-created category, check "Categorize" to add the gallery to a category, or, Admin your categories.
| | Other users can upload images to this gallery | If checked, users will be allowed to upload images to your gallery, but they won't be able to delete images or change the gallery. |
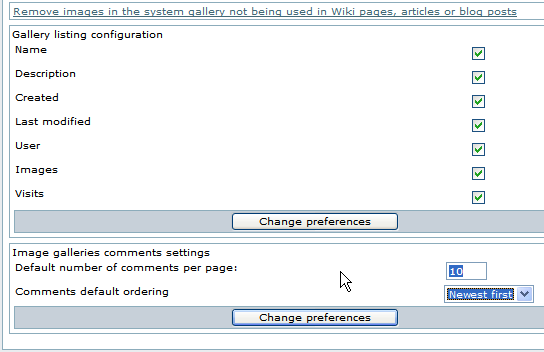
Create a gallery for testing by filling in the form, and clicking Save at the bottom of the form. Once Tiki creates the gallery, it will be listed like so:
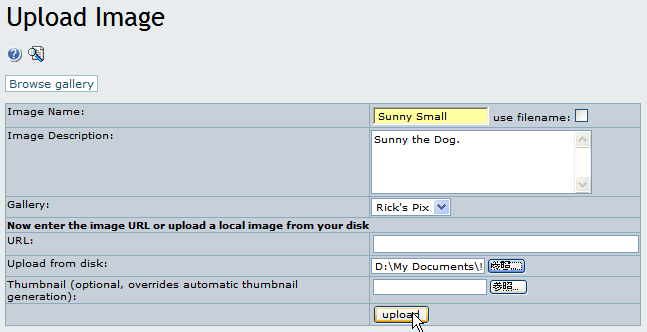
If you want to browse the gallery, click its name. On each line in the listing, depending on your permissions set you can see the "Actions" you can take on each gallery:
If you hover your mouse above each of the Actions icons, you can infer that they link to a set of tools including:
- Edit: edit the gallery information using the same form you used to create the gallery. Here, you can change gallery information, your categories or the size of existing thumbnail images.
- Delete: remove the entire gallery and its images. Use this with care, as it is a permanent operation.
- Upload: upload images to the gallery.
- List: browse the gallery's images as a list.
- Perms: configure permissions for the gallery (if you are an admin).
- Make Map: Generate a layer to be used with the maps feature (only availabl e for geographic galleries).
Let's examine some of these items in more detail:
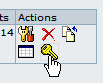
Upload Image
The Upload Action allows you to upload images to the listed gallery, and displays a form as follows:
After selecting a gallery you create, or a public gallery created by another user, you can either enter the URL of your image or select it from your local hard disk. Use only one method for each image, as results can be unpredictable if you upload the same image using both methods.
Tiki auto-generates thumbnails for uploaded images, but if you don't like the way they look, or if you do not want a simple thumbnail of the entire image, you can also upload your own thumbnails along with the image.
If the image is successfully uploaded, you will see its and its thumbnail displayed, as in this graphic:
Success! The image was uploaded and stored into the Tiki database or into a folder on your server. Note the image, the thumbnail, and information about how to browse the image or include it in an HTML page or a Wiki page. Keep these links in mind for use in your Wiki pages or Blog posts.
Note: If Tiki's thumbnail is the same size as the image, there are several possible explanations:
- The image is a GIF. Tiki cannot resize GIFs do to copyright limitations regarding their format.
- Your web server's PHP installation does not have the GD or ImageMagick graphics manipulation packages installed.
- Your web server's PHP installation's GD or ImageMagick packages are too old.
Browse or List Galleries
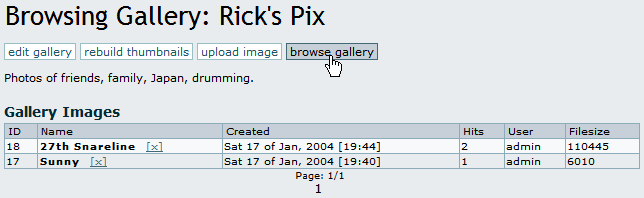
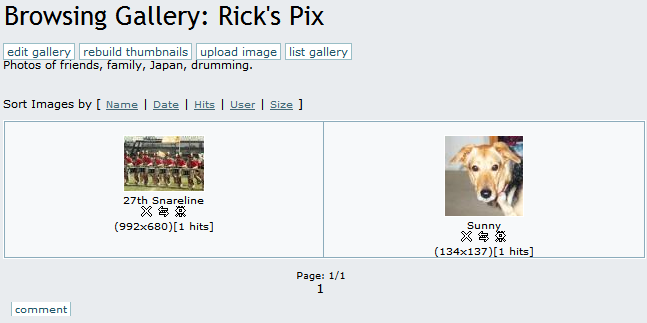
Clicking on the gallery name link allows you to browse a listing of thumbnails for the images in the gallery. Clicking on the "List" action displays a non-graphical, quick-loading list representation of the gallery with one image per line. The list looks like this:
In List View, click "Browse Gallery" to toggle back to its Thumbnail View. In the following graphic, you will notice a horizontal menu with links to Edit the gallery, rebuild thumbnails, upload images, or toggle back to List View. Above the image list or thumbnails, there are links to sort by name, date, hits, user or size. For example, clicking Name sorts in alphabetical order, from A to Z, and clicking Name again sorts in reverse alphabetical order, from Z to A. Try sorting for all the options, once you have several images uploaded.
For each image, a thumbnail is displayed showing the image title, its size and the number of hits (a hit is computed each time the image is browsed). Under each thumbnail, you will find icons for Delete, Edit and Popup which act on that image.
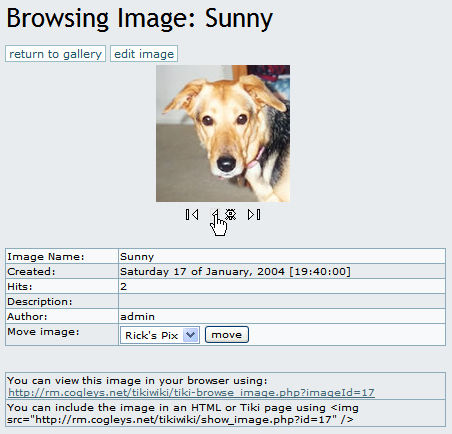
Click the thumbnail to browse the image actual-size. Here, you will find image information, an option to move the image to another gallery (if you have permission), and link information to allow you to display the image in an HTML page or a Wiki page, an article or a Blog. You will also see links to the Next and Previous images in the gallery to browse all the gallery images if you like.
Individual permissions for image galleries
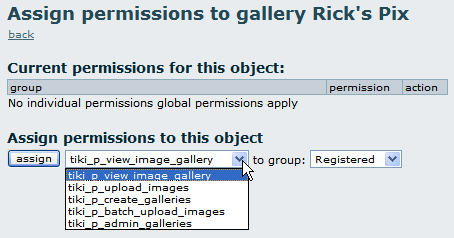
From the gallery listing screen, if you have the right permissions you can use the "Perms" action to set up individual permissions for an image gallery:
When you assign a individual permission for a gallery, you can override Tiki's global permissions system, so that only the users that have the permissions you have set for the gallery can view, edit or upload. This feature can be used to configure, for example, private galleries, paid galleries or galleries where only a special group of users can upload images.
The System Gallery
If enabled from the admin screen, Tiki can capture images referenced from other sites or URLs, storing them in its database, or in a folder on your webserver. Tiki displays those images in a special gallery called the "System Gallery". If you are an admin, you can browse the System Gallery, and remove images from it.
Tips & Tricks
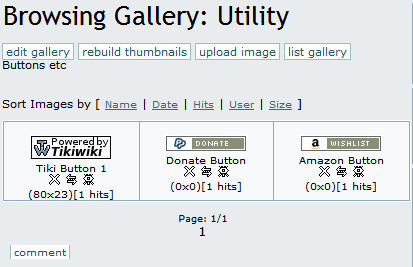
Utility Gallery: One idea for a creative use of a Tiki Image Gallery is to upload buttons or icons that you might use in the pages on your site.
Known bugs and problems
GIF Patent Issue: Thumbnail generation does not work for GIF format, resulting in a thumbnail which is the same size as the original image. This is due to patent issues, and cannot be resolved unless the patent for GIF format expires.
Related Information
Useful Links
|