Image Gallery User | |
The Menu | |
|
When Image Galleries are enabled and you have the right permissions, site visitors can see an Image Gallery menu can be clicked to open. From here you will be able to create galleries and upload images to the galleries. Collapsed and Expanded Menu: 

| |
Prior to Gallery Creation | |
|
At first, before galleries are created or images uploaded to them, the Galleries center panel appears as in this illustration. Notice the "create new gallery" link. 
| |
Creating a Gallery of Images | ||||||||||||||||||||||||||
|
Clicking the "create new gallery" link displays a form to create a new gallery, with fields to fill-in, as you can see here: 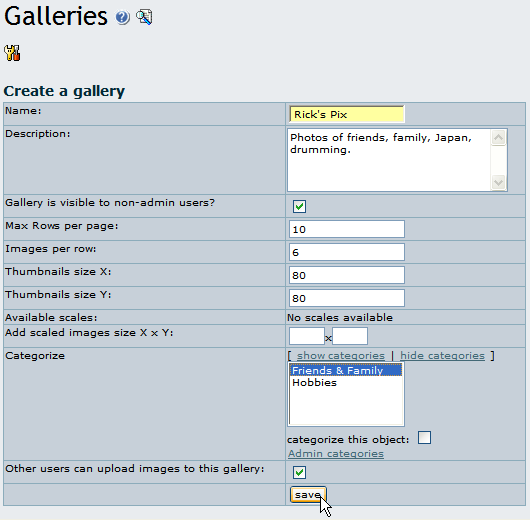
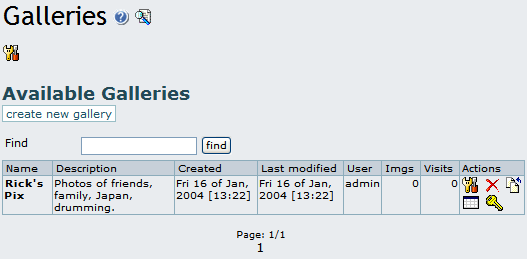

| ||||||||||||||||||||||||||
Upload Image | |
|
The Upload Action allows you to upload images to the listed gallery, and displays a form as follows: 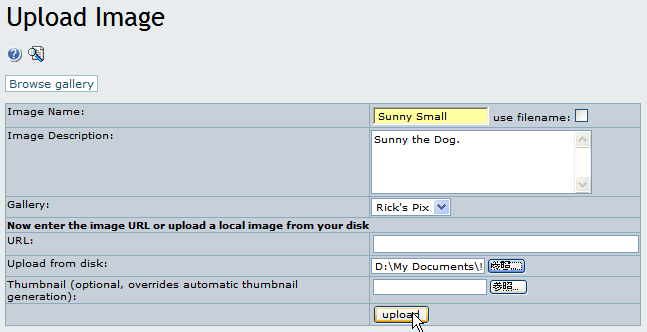
this picture is from an old tikiwiki version - Please feel free to update to a new one After selecting a gallery you create, or a public gallery created by another user, you can either enter the URL of your image or select it from your local hard disk. Use only one method for each image, as results can be unpredictable if you upload the same image using both methods. Tiki auto-generates thumbnails for uploaded images, but if you don't like the way they look, or if you do not want a simple thumbnail of the entire image, you can also upload your own thumbnails along with the image. Batch upload means that if you upload a zip file, the file will be automatically unzip and the individual images will be uploaded. The compressed format accepted are .zip (WinZip, PKZIP, Windows Compressed Folder). (see phpconcept.php /pclZip for more details)
If the image is successfully uploaded, you will see its and its thumbnail displayed, as in this graphic: 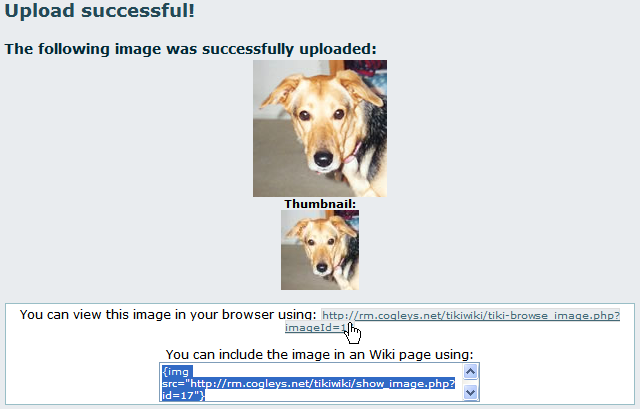
Note: If Tiki's thumbnail is the same size as the image, there are several possible explanations:
| |
Browse or List Galleries | |
|
Clicking on the gallery name link allows you to browse a listing of thumbnails for the images in the gallery. Clicking on the "List" action displays a non-graphical, quick-loading list representation of the gallery with one image per line. The list looks like this: 
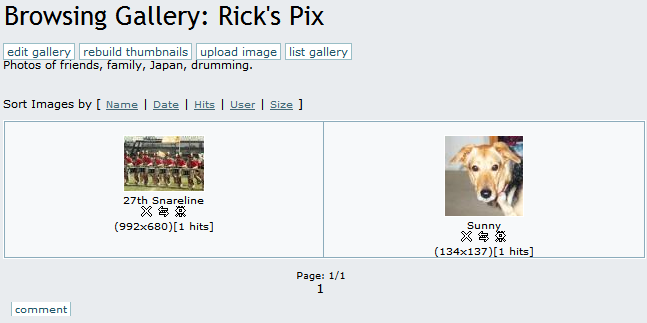
Click the thumbnail to browse the image actual-size. Here, you will find image information, an option to move the image to another gallery (if you have permission), and link information to allow you to display the image in an HTML page or a Wiki page, an article or a Blog. You will also see links to the Next and Previous images in the gallery to browse all the gallery images if you like. 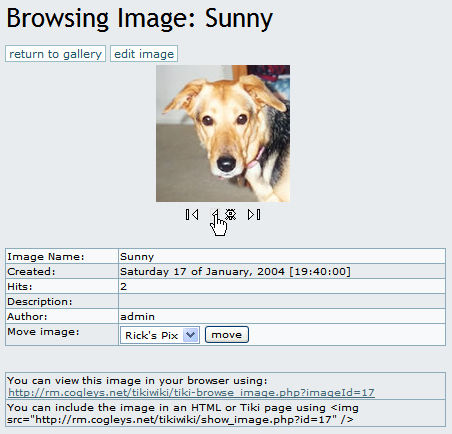
| |
Individual permissions for image galleries | |
|
From the gallery listing screen, if you have the right permissions you can use the "Perms" action to set up individual permissions for an image gallery: 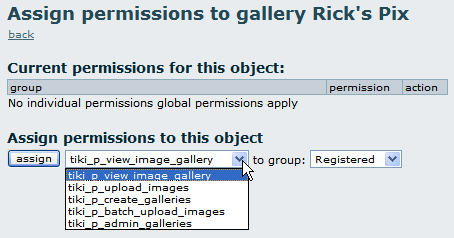
| |
The System Gallery | |
|
If enabled from the admin screen, Tiki can capture images referenced from other sites or URLs, storing them in its database, or in a folder on your webserver. Tiki displays those images in a special gallery called the "System Gallery". If you are an admin, you can browse the System Gallery, and remove images from it. | |
Tips & Tricks | |
Utility Gallery | |
|
One idea for a creative use of a Tiki Image Gallery is to upload buttons or icons that you might use in the pages on your site. 
| |
Random gallery image | |
|
In October 2008 a feature which can display a random image from an image gallery became available. A URL such as http:show_image.php?galleryId=2 will return an image which represents the specified gallery. The image selection is controlled by an option in gallery configuration which controls whether a random image is shown, the first image is shown, etc. | |
Shadowbox eye-candy | |
|
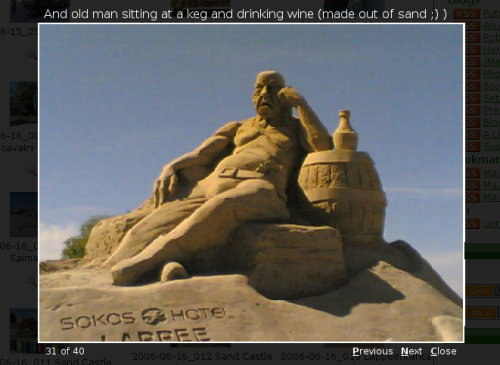
When Shadowbox feature is enabled (only on Tiki sites from Tikiwiki 1.10 onwards), images can be shown in a more fancy way. See this example from an image gallery: 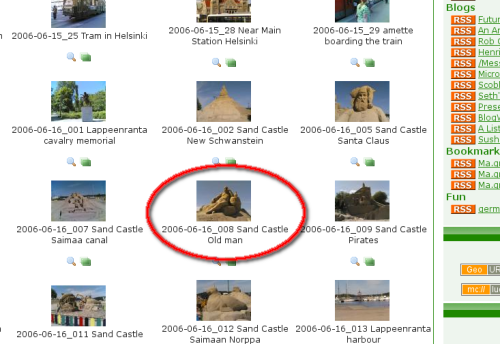

| |
Known bugs and problems | |
|
GIF Patent Issue: Thumbnail generation does not work for GIF format, resulting in a thumbnail which is the same size as the original image. This is due to patent issues, and cannot be resolved unless the patent for GIF format expires. More documentation
Related Information
Useful Links
| |