Using Articles
The Articles menu
For the site user, a simple menu is available. You can visit the Articles Home, see a list of articles, view Rankings, send a submission or view active submissions. Of course, what the registered user can or can't do and see in the menu is configurable.
A site administator can click the "New article" link in admin menu to create a new article.
Editing or Submitting Articles
- Topline - A kind of "teaser" line above the article title (small text size)
- Title - The article title
- Subtitle - Extra title information
- Source (url) - If appropriate or useful, a reference link can be specified. This displays at the end of the article.
- Author Name - The name of the author as it will appear in the article (you can use any name here).
- Topic - The topic to which the article is assigned. If you don't see options in the select box for topics then you must first create a topic. Use the admin topics link in the admin menu to create a topic and then go back to the edit article screen.
- Type is the type of article to create (i.e., article, review, etc.).
- Rating - This only shows up for review-type articles. A numerical rating can be assigned to whatever is being reviewed.
- Own Image - Articles can have an associated image. If you want your article to have an associated image you can upload an image using the Own Image field. If the article has no image but the topic has an image the article will be displayed with the topic image
- Use own image - By default the article will display the topic image (each topic has an image), if you want the article to display its own image instead of the topic image, check the Use own image checkbox.
- Float text around image - Select this to have text wrap around the image. The image will be on the left side with text starting to the right of it if there is room. If this is not selected the text will begin under the image. In the example below, the first image is floated, the second is not. The same behavior applies in view mode or list mode.
- Own image size x and Own image size y - Allows you to adjust the display size of the article image. Specifying only an "x" size will scale the image with a similar vertical/horizontal ratio.
- List mode image width - allows you to display the image in a different scale when viewing a list of articles in a smaller scale and when viewing the article. (tiki>=6.0)
- Apply template - To use this, you must have the "Use templates" box checked in the CMS admin page. Any templates created in the Content template section with the "use in cms:" box checked will show up in this drop down list.
- Categorize - Assign categories for this article.
- Heading - The heading isn't a heading in a typographical sense, but rather is the opening paragraph(s) of text. On the main articles page and when articles are displayed with the Articles plugin, the article heading text displays and is followed by the "Read more" link if the article also has a body section.
- Body - This is the main section of text that becomes available when the "Read more" link is followed (and also when the URL is for the article itself). In both the article heading and body, you can use the wiki syntax, plugins, etc. the same as when editing a wiki page. If you want to use HTML in the article make sure that the AllowHTML option is checked at the bottom.
- Publish/Event Date - Set the publishing date for the article. This affects when the article is visible on the Articles Home page.
- Allow HTML - Check this box to allow HTML content in the heading or body.
- Folksonomy Tags - Also known as Freetags or Tags, one or more of these can be entered for free-from categorization.
Finally, use the preview function as many times as you want to preview and edit the article. Make sure you click save before navigating away from the page.
Articles Home
The Articles Home displays the articles most recently added to the Tiki. system. The number of articles displayed on Articles Home can be configured from the General Admin CMS admin page. Articles Home can be set up as the Tiki Home Page from the admin screen if you want to use Tiki as a CMS system.
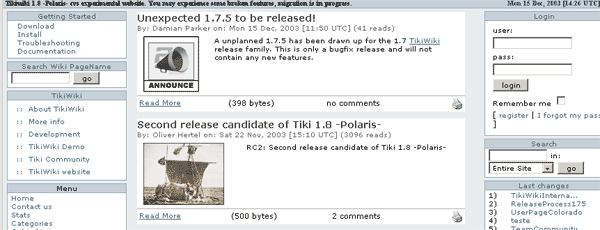
You will see each article displayed showing the heading and a link to read more where you can read the whole article:
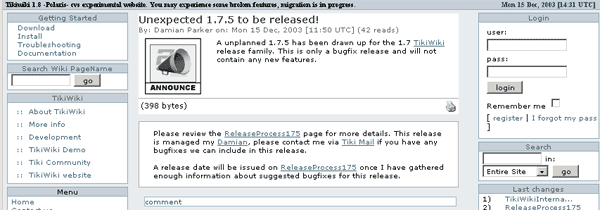
You can also filter the list of articles shown here by:
- type (article, review)
- topic (numeric id)
- find (a string to search for in the title, heading or body)
For example, you could make a Wiki link to a page showing only "reviews" with this:
[tiki-view_articles.php?type=review]
or, only articles with the word "Tiki" in them with:
[tiki-view_articles.php?type=article&find=Tiki]
You can also change the sort order from the default (newest to oldest) with the "sort_mode" option. For example, to list upcoming events in order of occurrance, use:
tiki-view_articles.php?sort_mode=publishDate_asc&type=Event
List Articles
The list articles section shows a list of articles.
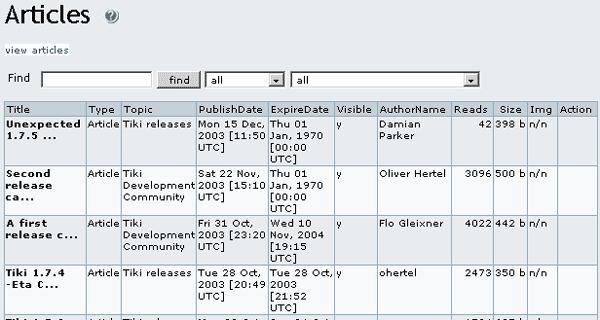
This list can be sorted by any column. Articles can be filtered by keyword. If you have the proper permissions you will see options to edit, read or remove articles in the actions column.
Rankings
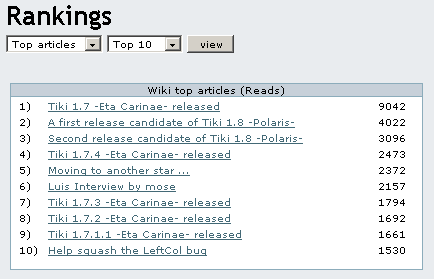
In the Rankings page you will access to rankings for the CMS system such as Top Articles, Top Authors, etc. You have to select the ranking to display and the number of records to display and click the view button to see the ranking.
Submit Article
Submitting an article is the same as editing an article with the difference that the result will be stored as a submission and not published inmediately as an article. The process to edit and send a submission is the same as editing and article so you should read about editing above articles if you haven't to find out.
View Submissions
You will view a list of submissions and if you have the permissions you may see links to edit, remove or approve a submission. Once a submission is approved it becomes an article.
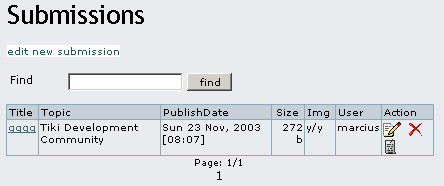
In the Action column, holding your mouse over the icons will indicate which action they will perform.