History: Category Admin
Preview of version: 13
Categories Admin
Table of contents
By administering categories in tikiwiki you can manage large sites with a lot of content being created on the fly, and make navigation and indexing much easier.
Category can also be used together with permissions to hide objects/pages from specific groups of users, creating "private" areas that may even look different from the rest of the site.
Tikiwiki is feature rich, and many features overlap, especially when it comes to how many ways you can organize content. In designing a tikiwiki site you have to decide early what kind of navigation is most appropriate and then use menus, hyperlinks, topics, structures and themes accordingly.
Are you building a knowledge base with a more or less permanent table of contents? - use categories.
Are you collaboratively writing documents that need to be viewed in order, or published as a hard copy (PDF) - use structures.
Are you hosting discussions, blogs or forums where topics tend to come and go a lot? - use regular hypertext and wiki links, rather than getting bogged down in creating hierarchies that nobody will care about tomorrow.
Are you creating objects/pages that a time sensitive status - use trackers.
Are you using tikiwiki with multiple groups who need access to separate or private areas? - use structures or groups
Creating categories and sub-categories
You can reach administration of categories through "Admin -> Categories" at the main menu.
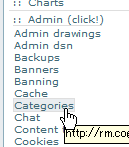
Then, you can add a new category at top level (for instance: "Status").

Note that you have "Assign permissions automatically: (recommended for best performance)". Leave it toggled on, for the time being, if you are not sure.
If you click on a pre-existent category (for instance, in the newly created Status category), you'll be ready to add subcategories to it.
You should see the path to the category you are in, like "Current Category: Top :: Status", in this case:

Then, you can add a new category (for instance: "1. To Do"), as a child of the parent category ("Status") selected.

Once created, if you click on the the ">>>" at the right of "Status" category, you could see the child categories below:

After some work, you could have something like:

But imagine that you would like that all content is readable only by registered users of your site, and only the content categorized as "7.Validated" is readable by anonymous. You could achieve that using category permissions (see following section).
Assigning permissions to categories
Basic functioning
To assign permissions to a category, go to tiki-admin_categories.php and click the appropriate key icon, which will send you to tiki-categpermissions.php. tiki-categpermissions looks and works very much like tiki-pagepermissions.php.
To see the list of permissions that can be applied, check Categories Details.
The current category permission system follows the following rules.
- Category are considered objects, just like wiki pages and forums, etc.
- Permissions assigned to children objects take precedence over permissions assigned to parent objects.
- If no permissions are assigned to an object, the permissions assigned to the closest ancestor object takes precedence.
- If no permissions are assigned to an object and any of its ancestor objects, the global permission is considered.
- In the case where an object belongs to multiple categories, the better-safe-than-sorry approach is taken. If a user lacks a given permission regarding a particular category, that category takes precedence when considering if user has that permission.
Example
Following with the example in Categories Admin, we need to click on the green key (![]() ) icon at the left of "Status" category:
) icon at the left of "Status" category:

which could show as something like:
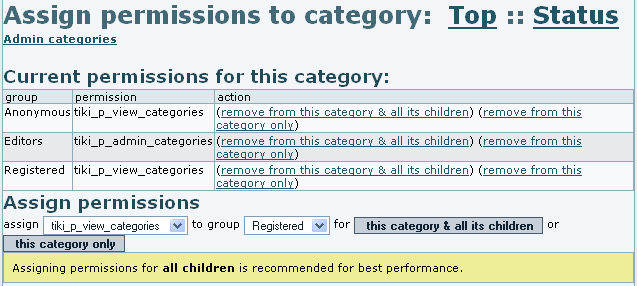
As stated in the cited example, we want to remove from the anonymous group the permission to view the category content from all the "Status" subcategories. The easiest way is to click on "(remove from this category & all its children)":
| group | permission | action |
| Anonymous | tiki_p_view_categories | (remove from this category & all its children) (remove from this category only) |
| (...) | ||
You might need to confirm the action, depending on your configuration, to end up with a table like this:

Then, you can go back to "Admin categories", click on the ">>>" sign at the right of Status category, and click on the green key (![]() ) at the left of 7. validated (see image above, if needed). There we can add the permission tiki_p_view_categories for the anonymous group to read the content from that category, through clicking on "this category only" (or add the permission to that category and its children using the other button, if we had some child categories inside, and we would wish to do so).
) at the left of 7. validated (see image above, if needed). There we can add the permission tiki_p_view_categories for the anonymous group to read the content from that category, through clicking on "this category only" (or add the permission to that category and its children using the other button, if we had some child categories inside, and we would wish to do so).
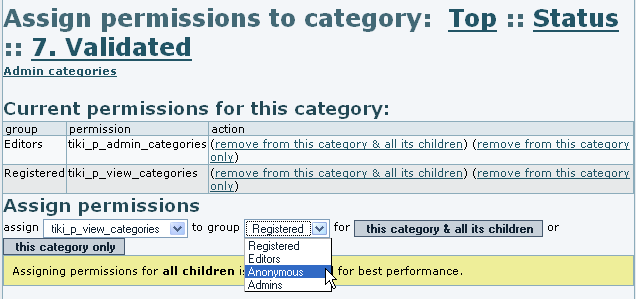
That's it. 😊
Note that if there is no permission assigned to a category, you will see the yellow key (![]() ) icon next to it.
) icon next to it.
And also that, starting in Tiki 1.10, a new category permission is added to Tiki in order to easily allow granting (or restricting) users to edit contents assigned to a category, through the permission "tiki_p_edit_categories" (= "Can edit items in categories").
Adding content to categories
You can add content to the categories from editing an object itself (see Category User), on a edit an object by object basis, or in a centralized procedure from "Admin -> Categories".
For instance, we can add some content to the category "1. To Do", from the example above. We can click on the category name in the list, and we would see the objects which are already assigned to this category (no one in this example), and add new (existent) objects to this category:
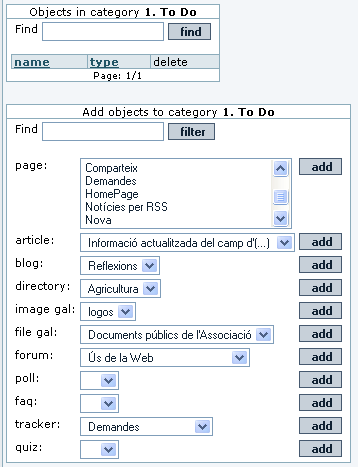
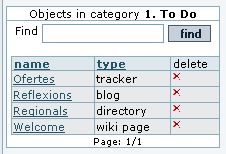
After adding some objects, you will see them listed on the box "Objects in category 1. To Do":
Applying themes to categories.
You can assign a basic theme style for you tiki site, but select some other theme site (such a customized them style similar to the previous but columnless, for instance) for specific objects in your tiki, or for specific categories. This way you might have, for instance, a homepage without columns, and after clicking on some links, keep browsing your site with some column/s on the side/s.
To enable this feature, you need to toggle it on as all the rest of fetures at "Admin -> Features".

The rest of information about how to use this feature can be read at its specific documentation page: Theme Control